Yoga | ExTension and Recovery Yoga

   
  ExTension & Recovery Yoga  


Sam's Bio
 | Contact Sam | Home
Click Here To Adjust Your Text Size

17 Cents, an Apple and a Flower:
The Student-Teacher Relationship


Recovery Yoga
A Practical Guide for Chronically Ill, Injured,
Post-Operative and Aging Yoga Students


Recovery Yoga cover
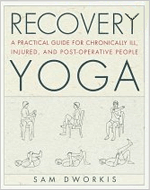
Recovery Yoga is a guide for those with chronic illness, injuries, or age-related lessening of mobility. This is a graduated program that can be practiced successfully by people who are unable to exercise normally, and for who are bedridden, confined to a chair, or limited in their mobility for any reason.

With this program, people with limited mobility can use yoga to take charge of their own health and restore a sense of control over their lives. When appropriately practiced, Recovery Yoga can promote feelings of well-being and to whatever extent is possible, to accelerate healing.


Under normal circumstances, you don't feel your body. It's just there operating in the background providing you with the vehicle that takes you about your daily business. 

However when you are chronically ill or injured, your body no longer feels as if it is in the background. It is ever present reminding you that your former comfort and freedom of movement is compromised or no longer exists. This program is designed not only to give your body a jump-start toward wellness, but to take your mind off the discomfort of your body, quiet your mind and offer you some relief.

Recovery Yoga is a guide for anyone who feels their body is failing them, be it from chronic illness, injury, surgery, or from just growing older. This book will assist you in taking responsibility for your own health maintenance, and will give you practical tools to use for feeling better about yourself, both physically and emotionally.


A Personal Message from Sam Dworkis:

Below are two lengthy excerpts from Recovery Yoga which I hope will give you a feeling for the importance of this program. 

Before I became ill, I used to tell people who came to me for "remedial yoga," that there was no "magic bullet" to yoga. I said that for it to be effective, a person needs to do at least some of all its various modes (such as breathing exercises, forward bends, back bends, twists, standing poses, inversions, etc.).

But in recent years, my thinking has changed considerably. As I continue to study the nature and characteristics of fascia; I am starting to understand how illness and injury significantly contracts it, and how yoga can play a significant role in mitigating the pain and tightness that contracted fascia creates.

I had studied the characteristics of fascia years before I became ill; but it was what I learned from my own illness, which was codified by teaching others, that lead me to recognize that yoga indeed has a "magic bullet"  The magic bullet of yoga comes from appropriate and simple fascia stretching. In this website, throughout the Mechanics of Yoga pages, I discuss the nature of fascia and its role in human physical dysfunction. I feel the more you understand fascia's mechanisms the more you will appreciate the concepts and principles of Recovery Yoga.

The first excerpt below is fundamentally important because it introduces the process by which to control your breathing and how to integrate your controlled breathing with the movement of your body.

The second excerpt discusses some of the actual movements of "the magic bullet," that serve to release hypertonic fascia; and thereby, to offer substantial relief of chronic body pain.

I encourage you to explore these pages and invite you to email me directly should you have any comments or questions that can help me to clarify this work.

__________________

The following excerpts are from:


RECOVERY
YOGA

Chapter 3


Physical therapists are fond of saying: “If you don't use it, you lose it!” But when you are chronically ill or injured or are recovering from surgery, traditional or standard exercise becomes nearly, if not totally, impossible. It's easy to become discouraged. Even if you are able to exercise, are you sure that those exercises are appropriate for your condition?

Here is a series of non-stressful, minimal movement exercises that are most appropriate for your recovery. They embellish upon the breath, body, and mind connection. It is imperative that you begin here as you will establish the foundations for the exercises in the chapters that follow. In this chapter, we will integrate breath management with the movement of your body. Coordinating your breath with the movement of your body is what makes yoga different from common exercise. More specifically, common exercise is “outer directed,” whereas yoga is “inner directed.”  

Outer Directed Exercise

Outer directed exercise is when you exercise to meet a specific goal. For instance, participating in a sport where the objective is to make points, to beat an opponent, or to improve time is outer directed. Exercising specifically to lose weight or exercising while enjoying the camaraderie of others is outer directed. Exercising to the beat of music or using a treadmill while watching television is outer directed. Exercise done to you by a physical therapist or when you train with a personal trainer is outer directed. And so on.

Inner Directed Exercise

Inner directed exercise, on the other hand, is when you have no specific intention or goal other than the exercise itself and to stay aware during the exercise. The purpose is to use the exercise to explore more of what is inside you than outside you. Can I turn my attention inward during exercise and quiet my mind? How can I direct the feeling to a more specific area of my body? How does it feel? Where does movement begin? Where does it end? Can I stay aware of my breath during each movement?

Our intention with inner directed exercise, then, is to let go of goals; of forcing or trying. The very nature of trying by the way, is in and of itself, outer directed.

*  *  *

Under normal circumstances, you don't feel your body. It's just there operating in the background providing you with the vehicle that takes you about your daily business. However when you are chronically ill or injured, your body no longer feels as if it is in the background. It is ever present reminding you that your former comfort and freedom of movement no longer exists. This program is designed not only to give your body a jump start toward wellness, but to take your mind off the discomfort of your body, quiet your mind and offer you some relief.

There may be some exercises in this program, that based upon your current condition, may be inappropriate for you. Under no circumstances do I encourage you to “work through the pain.” I intentionally began this program with exercises that, at first glance, may have seemed extremely simple. They are important. Regardless of your physical condition, every one, begins here. Only your condition determines how fast or how slow you go. The elementary exercises in this chapter become the foundations for all exercises that follow. Learning to control your breath and to coordinate it with the movement of your body has remarkable and beneficial effects upon your blood chemistry and nervous system.

Simply do what you can do without pain or effort. If you can not complete an exercise without creating or exacerbating your pain, go back to the previous exercise and stay with it until you can continue on without pain or discomfort. Remember that success is not measured by how much you can do. It is measured by simply doing what you can do at any given moment.

You have spent a good amount of time setting your breathing foundations and learning the three part diaphragmatic breath. In all the exercises that follow, I am going to instruct you to integrate your controlled deeper and softer breath with each exercise. As you practice, allow your deeper breath to move diaphragmatically. That is, during inhalation, breathe first into your belly, then secondly, move that same inhalation up into the middle ribs and, if possible, complete the third part of your inhalation in your upper chest. Then allow your exhalation to move downward; from the top, to the middle ribs, and finally concluding your exhalation in your belly. You never have to force or completely fill all the way up or empty all the way down. Just simply and easily breathe in this three part mode. 


PRACTICE REMINDER

Remember that each exercise is a foundation builder. That is, what you learn from one exercise is a foundation for the next. Do as many of the exercises as you can in the order presented. After you have become familiar with them, you can adapt any or all of them according to the guidelines given in the Conclusion.

*  *  *

If you can get down on the floor, lie on a soft carpet or exercise pad. Otherwise, lie on your bed. As always, support your head if necessary.

Exercise 14: Moving Fingers with Breath

You might consider this first set of exercises unimportant. However, other than diaphragmatic breathing, this is the first foundation exercise which coordinates body movement with breathing.

When you are ready to begin, take a soft, deep inhalation and do nothing other than pay attention to your breath. Then, during your next long and slow exhalation, slowly close your fingers making a lightly held fist with both hands. That's right! While controlling your exhalation, slowly move your hands into softly held fists (The object is to coordinate the movement of your fingers with your exhalation). Hold your fists closed during your next inhalation. Then as you exhale, slowly straighten your fingers as you release your fists. “Rest” your hands during your next inhalation. Then again coordinate your next exhalation with the closing of your hands. Every time you exhale, you will be moving your fingers either into or out of a fist. Every time you inhale, your fingers will not move. Do this a couple of times to get the idea

OK, now let's do some exercises which further coordinates the movement of your hands with your breath. Your intention is to lengthen the time it takes make and release your fist(s). You can approach it both ways. Slowing your breath slows the movement of your hands. Or slowing your hand movement slows your breath.  Remember: Move your fingers only during exhalation:

 Coordinate your exhalation with the closing only your right hand. Hold your fist while you inhale and open your hand during your next exhalation. Do a set of five.

 Coordinate your exhalation with the closing only your left hand. Hold your fist while you inhale and open your hand during your next exhalation. Do a set of five.

 Coordinate your exhalation with the closing of both hands. Hold your fists while you inhale and open your hands during your next exhalation. Do a set of five.

Finally, doing something a little different, coordinate your exhalation while you close your hands and then while you inhale, open your hands. Do a set of five each with your right hand; your left hand; then both hands.

CAUTION

If any of the next exercises cause or exacerbate pain anywhere in your body, you must immediately stop. Because these exercises are progressive in nature, you need to go back to an exercise where you felt totally comfortable. From there, take your time to reset your foundations and then continue. From time-to-time, you will see instructions to modify an exercise or to eliminate it. You must always remember that there is a difference between feeling tired and experiencing pain. If you become tired, simply stop and rest. If you experience pain, you must modify your movement by doing less or stop altogether and go back to a previous exercise that gave you no discomfort. This will help you set your foundations in a non aggressive manner and allow you to continue according to your capacity.


Exercise 15: Moving Arms with Breath

    Begin with both arms at your side, palms down. Take a deep inhalation. As you exhale, slowly move your right arm straight up and over your head as far as it can go without pain (see Caution). Conclude your exhalation when your arm comes all the way over your head [Fig.12] or goes as far as it can without pain. If there is pain or stiffness as your arm reaches its endpoint, place a support where your arm will land [Fig. 13].


Recovery Yoga by Sam Dworkis arm overhead with support

As soon as your arm has come to rest above your head, take a slow deep inhalation and relax. Then coordinate your exhalation as you return your arm over your head to the side of your body. Repeat in sets of five with each arm.

Since the object with this exercise is to coordinate the movement of your arm with your breath, practice until you can conclude your exhalation at the very moment your arm completes its movement and comes to rest.

PRACTICE TIP

If your arm can not go all the way over your head comfortably, place a pillow or one or more folded blankets over your head where your arm will land. If moving your arm directly over your head hurts your shoulder, you can adapt the exercise by moving your arm sideways (like angel wings) as far as you can go without pain. Remember never force or cause discomfort anywhere.


PRACTICE REMINDERS

The object of each of these exercises is to:

 Slow the time it takes to move your body with your breath. You can approach it either way: Slowing your breath slows the movement of your body; or slowing the movement of your body slows your breath.

 Coordinate the movement of your body with your breath.

 Create an appropriate “action” without creating or exacerbating any pain what-so-ever

 Find the endpoint for each exercise where you can hold and “relax” into the “action.”  That is, move into a place where you feel a mild stretch that is neither painful nor intense.


Exercise 16: Wind milling Arms With Breath

Once you have mastered “exhaling” each arm over your head and “exhaling” it back down again, you are ready for the more advanced variation which is slowly “wind milling” your arms with a coordinated breath. Begin by taking a deep inhalation. As you exhale, slowly extend your right arm over your head. Rest during inhalation. During your next exhalation, simultaneously extend your left arm over your head while at the same time, return your right arm to your side [Fig. 14 and Fig. 15 with arm supported]. Inhale and rest; exhale and repeat again moving both arms simultaneously.

Recovdry Yoga

Practice until both arms reach their opposite endpoints at exactly the same time which might be more difficult that you would expect.

Exercise17: Extension Releases Tension

This exercise teaches you one of the most fundamental and important principles of exercising your body: “Extension Releases Tension.” Lie on your back with your legs fully extended. Begin by lifting your right leg only about twelve to sixteen inches off the floor [Fig.16]. For now, forget how you are breathing. Just lift and hold it up for a few breaths. Take a look. Is your foot really twelve to sixteen inches up? (Adjust if necessary and remember not to judge but to simply observe.) After holding your leg for several breaths, slowly place it back down. Repeat with your other leg. Pay attention to what is happening and how it feels. 

Recovery Yoga by Sam Dworkis soft leg


PRACTICE TIP

If your back hurts when lifting your leg, simply bend the opposite leg and firmly press its foot into the floor [Fig.17].


Recovery Yoga by Sam Dworkis passive leg with back support


Did you experience any discomfort in your elevated leg or hip? Did your leg feel heavy? Did it shake? Did it quickly become tired? Did your lower back ache? If you experienced no discomfort what so ever, hold your leg up again for a longer time allowing it to hang loosely. You should soon experience some or all of these discomforts.

Now, before you lift your leg, extend both your heel and toe mounts (that part of your foot where your toes attach) away from you. Keep extending your leg away from you for the entire time you hold it up. The feeling you want to create is that  your foot and entire leg is reaching for the wall on the other side of the room. This should give you a feeling that your feet are active [Fig.18a] and that your entire leg is actively stretching away from you [Fig.18b].

 Recovery Yoga by Sam Dworkis active feet active legs

This is known as activating your foot. Keep your heel and toe mounts extended (activated) as you again slowly lift your leg about twelve to sixteen inches up and hold it there for a few breaths. Remember to keep extending the entire time you are lifting your active leg. Exhale while you lower your leg. Repeat three to six times with each leg.

PRACTICE DETAIL

Take a moment to double check the height of your elevated leg. Initially, it may be difficult to accurately gauge when it is twelve to sixteen inches high, however with practice you will soon be able to accurately determine its height even with your eyes closed.


An extended leg with an active foot releases tension. This is a fundamental principle of this program;Extension Releases Tension. You can apply this principle to your arms as well. Take a moment; with your breath, “wind mill” your arms as you did in Exercise 16. This time however, activate your hands by stretching your fingers and making an “L” with your thumb (Fig.19).

Recovery Yoga by Sam Dworkis extended hand               

Activating your hands helps your arms to extend in the same way activating your foot helps to extend your leg.


*  *  *  


Exercise 18: Coordinating Movement of Legs With Breath

Start by lying down. When ready, take a deep inhalation. During exhalation, extend and slowly lift your right leg about twelve to sixteen inches. Inhale as you extend your leg. Feel as if you are extending your leg away from your hip, through your knee and through your foot. As you exhale, slowly lower your leg back down keeping it extended until it touches the floor. Then inhale and completely relax resting for as long as you wish. When you are ready; exhale, extend, and lift the opposite leg twelve to fourteen inches off the floor. Hold and keep it extended during inhalation. Then lower it during exhalation.

While coordinating your breath, lift alternate legs, one at a time, until you can comfortably “breathe” your legs up and down without tension. Remember to keep your leg and foot active when lifted. Do as many sets as you wish.


PRACTICE REMINDERS

  • Keep your eyes rotating downward

  • Keep your tongue soft and off the palette

  • Relax your jaw and unclench your teeth

  • Breathe through your nose if possible, allowing your breath to make a gentle “hissing” sound.

  • And above all, always remember that Extension Releases Tension.  


Sequence: Putting It Together - Coordinating Movement of Arms and Legs with Breath:

This sequence brings together all you have learned thus far. Extend and slowly lift your right leg twelve to sixteen inches off the floor while simultaneously extending and moving  your left arm all the way over your head. Coordinate both movements with your exhalation. [Fig. 20]. (If necessary, use a support for your arm when it comes to rest over your head.)  


Recovery Yoga by Sam Dworkis windmill arms and legs


Then inhale and keep both your arm and leg extended and active. During exhalation, slowly return your arm and leg to where you began. Inhale and totally relax. Rest as long as you wish.

When you are ready to continue, exhale and lift the left leg and right arm. Inhale at your endpoint keeping your arm and hand as well as your leg and foot active. Exhale as you return your arm and leg.

The object is to coordinate the movement of your arms and legs with your breath. Therefore, practice until your exhalation concludes at the very moment your arm and leg complete their movement, both when going up and coming back down.


CAUTION

Depending upon your condition, this sequence could be strenuous. Omit this (or any) exercise if it causes or exacerbates discomfort or pain.


__________________


The following are excerpts from:

RECOVERY
YOGA

Chapter 7

Exercise 41: The Standing Shoulder Stretch (With Knees Bent)

Face the kitchen counter placing your hands flat on the counter top near the edge. Your hands should be shoulder's width apart with your index fingers parallel. Then bend your knees about one-quarter of the way and with short little steps, walk your feet away from your hands making sure your hands remain “glued” to the counter top. As you are walking away from your hands, begin bending at the waist making sure that your knees remain bent [Fig.98].

Recovery Yoga by Sam Dworkis full torso stretch

As you fold at the waist, keep your back straight. Never drop your head below the level of your shoulders. Instead, keep your ears slightly higher than your shoulders. It might be helpful if you visualize:

     Your throat lifting your neck and head upward.

     Your shoulders moving down and away from your ears.

     Your entire spine and neck lengthening.

These are the same details you learned in Active Pose of the Child on page 92. Take a deep inhalation. As you slowly exhale, lengthen your spine a little bit further by subtly moving your hips away from your (very well grounded) hands. This should enhance the overall stretch in your arms, shoulders, and/or sides of your body. However, if it moves you into pain, do not move your hips as far. As you inhale, lessen the stretch by allowing your hips to move just the slightest amount toward your hands. Exhale and stretch; inhale and release. Repeat three to six times. Then slowly walk your feet toward your hands and stand upright. Rest for a while and repeat the entire sequence a few more times.


WARNING AND PRACTICE TIPS

  • To protect your back and neck:

  • Keep your knees bent.

  • Do not fold your body too far downward.

  • Keep your hands “glued” to the counter top.

  • Do not shrug your shoulders.

  • Keep your head from dropping down. Instead, think of lifting your throat upward.


 *  *  *

Exercise 42: The Full Torso Stretch
aka The Wiggle and Waggle

This is one of my all time favorite yoga exercises. After sitting for prolonged periods, it helps to release leg and torso body tension. It is also a great warm up for any other exercises you do.

Start from Exercise 41: The Full Torso Stretch (With Knees Bent). Making sure that your hands are firmly “glued” to the counter top, slowly and subtly move only your right hip away from your hands. At the same time<: 1) move your left hip subtly toward your hands by increasing the bend in your left  knee, and  2) slowly and subtly straighten your right knee. This causes your entire right side to stretch. [Fig. 99].                          

Recovery Yoga by Sam Dworkis the wiggle and the waggle

Once you start to feel a gentle stretch on your right side, stop and take a long deep inhalation. As you exhale, subtly move your hips a little bit more into the stretch (but never into pain). Gently relax the stretch as you inhale. Exhale and stretch again. Inhale and relax. Repeat three to six times. Then release to the other side and repeat.

PRACTICE TIP

  • You can enhance the stretching action during The Wiggle and Waggle by pressing your hands downward and “pushing” them slightly forward (not really allowing them to actually move) while at the same time, subtly moving your hips away from your hands.


PRACTICE REMINDERS

  • Keep your knees bent.

  • Do not fold your body too far downward.

  • Keep your hands “glued” to the counter top.

  • Keep your shoulders moving away from your ears. Visualize lengthening your neck.

  • Increase the action only during exhalation. Release the action during inhalation.


 *  *  *

Exercise 43: One Leg Hamstring Stretch

This is another exercise designed to isolate and stretch your hamstring muscles. Face the kitchen counter and place your hands firmly on top near the edge. Just as you did in the pervious exercise, fold at the waist, However, instead of walking both feet the same distance away from the counter, walk your left leg about 18 to 24 inches further away than your right leg. Then bend your right knee just a little and be sure that both feet press solidly into the floor [Fig. 100].

Recovery Yoga by Sam Dworkis hamstring stretch

As you slowly exhale, subtly move both hips away from your hands and you will feel a stretch (action) in the hamstrings of your forward leg. (If you feel a stretch in the sides of your body or in your shoulders, lift your entire torso a little bit higher. You want to isolate the stretch only in the hamstrings of your forward leg.) If you can not isolate a distinct stretch in your hamstrings, you need to refer to the Lying Down Hamstring Stretch on page 56.

Inhale and relax the stretch. Exhale and enhance the stretch. Repeat breathing and stretching three to six times. Then slowly release and change to the opposite leg doing a few sets per leg.


PRACTICE TIP

You can enhance the action in your hamstrings by:

  • Gently rotating your sitting bones upward.

  • Moving your hips away from your hands.

This is the same hip action you learned in Exercise 36, The Cat-Cow on page 9.


CAUTION FOR ONE AND TWO LEG HAMSTRING STRETCHES

If you feel a stretch (action) directly behind your knees or in your sitting bones but not in or near the center of your hamstrings, immediately stop. You are stretching the tendon attachment of your hamstrings rather than the muscle itself. This is not correct and can create an irritation of the tendon. You can avoid tendon stretching by bending your knees just a little bit more which should isolate the action more into the center (the belly) of the muscle.


  *  *  *

Exercise 44: Two Leg Hamstring Stretch

This exercise begins as Exercise 47: The Full Torso Stretch (With Knees Bent) on page 103 However, instead of feeling the action in your shoulders, arms or the sides of your body, you want to isolate the stretch (action) in both hamstrings.

Place your hands firmly down near the edge of the counter top. With bent knees, slowly walk away from your hands while folding at the waist. Now slowly begin straightening your legs (but not all the way) and similar to the One Leg Hamstring Stretch, begin to lift your sitting bones as you subtly move your hips further away from your hands [Fig. 101].

Recovery Yoga by Sam Dworkis leg stretches

Once you isolate the stretch (action) in your hamstrings, relax the stretch and take a deep inhalation. As you slowly exhale, again increase the action by gently lifting your sitting bones while at the same time moving your hips away from your hands. Inhale and relax the action. Exhale and increase the action. Repeat breathing and stretching three to six times. Then walk forward, stand upright and rest. Do as many sets as you wish.


PRACTICE TIP

If you can not isolate your hamstrings or you can not feel the stretch equally in both legs, stop and go back to the One Leg Hamstring Stretch on page 106. Take your time. After you can isolate a clearly defined hamstring stretch in one leg, then return to the Two Leg Hamstring Stretch.

Click here for a short video showing the complete Wiggle and Waggle.

*  *  *  

__________________

Yoga
A Guide for Chronically Ill People
by Sam Dworkis

is published by:

 Random House/Three Rivers Press, New York,
ISBN 0-517-88399-6


Recovery Yoga

All profits from sales are used solely
for the maintenance and on-going
development of this website.


Go To: Recovery Yoga Reviews
Go To: Purchase Recovery Yoga
Return To: Top of Directory
 
Yoga | ExTension and Recovery Yoga Menu
  About Sam  
 
Sam Dworkis   Author and Yoga Teacher Since 1976
 
  SAM'S BOOKS
and DVD


Recovery Yoga Cover  
Recovery Yoga

Yoga for chronically injured, ill, & aging people


Sam's DVED  
The Video Lecture

A 75 Minute Lecture "How Yoga Works"

My Personal List
Of recommended yoga products in association with Amazon.com


TABLE OF CONTENTS
 
  Part 1:
THE MECHANICS OF YOGA
  How Yoga Works
  Toward
  Intrinsic vs. Extrinsic
  The All Important Fascia
  7 Principles
  NeuroMuscular Laws
  Bachin Alignment
  Pain Management
  Yoga & Aging
  Meditation & Yoga
  Spirituality & Yoga
  Religion & Yoga
  Benefits of Yoga
  Q & A
  Free Yoga Videos
  Free Yoga Essay:
Yoga for Equestrians
  Free Essay Archive
  Top of Menu
 
  Part 2:
PUBLISHED WORK
  ExTension Yoga - Excerpts
  ExTension Yoga - Reviews
  Recovery Yoga - Excerpts
  Recovery Yoga - Reviews
  The Video Lecture
Order Sam's Books & Video
  Top of Menu
 
  Part 3:
WORK WITH SAM
  Workshops & Seminars
  Yoga Teacher Training
  Yoga Teacher Training Outline
  Charges & Fees
  Next Yoga Seminar
  Lodging
  Biography
  Top of Menu
 
  Part 4:
PARTICIPATE
  Open Letter to Yoga Teachers
  17 Cents, an Apple, and
a Flower: Participating in the Traditional Student-Teacher
Relationship
  Give Your Feedback
  Feedback Given
  Links


SAM'S PERSONAL LINKS


Yoga | ExTension and Recovery Yoga

Click Here: If you would like a personally signed copy of ExTension or Recovery Yoga.

When you click on the Amazon.com logo from my website, ANYTHING you purchase generates a commission that is used for my website's maintenance. See my lists of:


Copyright ©2008 by Sam Dworkis - All rights reserved. You may copy, reprint or forward all or part of the material in this website to friends, colleagues, and clients provided (1) its use is not for resale or profit, and (2) that Sam Dworkis and www.extensionyoga.com is appropriately credited. Material from my website may used only with my written permission in websites where my books, ExTension Yoga or Recovery Yoga are sold. Terms & Conditions for Use